
The Problem: Disk 100% Windows 10 = FRUSTRATION!
Programs running slow, web pages taking forever to load, your fist flying through your screen…those of you having issues with your computer having 100% disk usage are invariably frustrated. It’s been an ongoing issue with me. I like to host karaoke and my videos were stuttering and running choppy. NOT GOOD! Well, after HOURS of research online and trying EVERYTHING. I finally found two actions that changed…everything. First, the end result. Here’s my disk usage right now, running tons of Chrome windows and a few other programs.
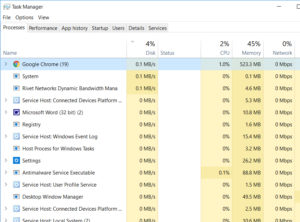
Here’s how to fix the 100% disk usage problem (at least, what worked for me).
2 Step Solution For 100% Disk Usage
Here are the two things you will be doing:
1. Turn Off All Notifications & Actions
2. DISABLE Superfetch
STEP 1: Turn Off All Notifications & Actions
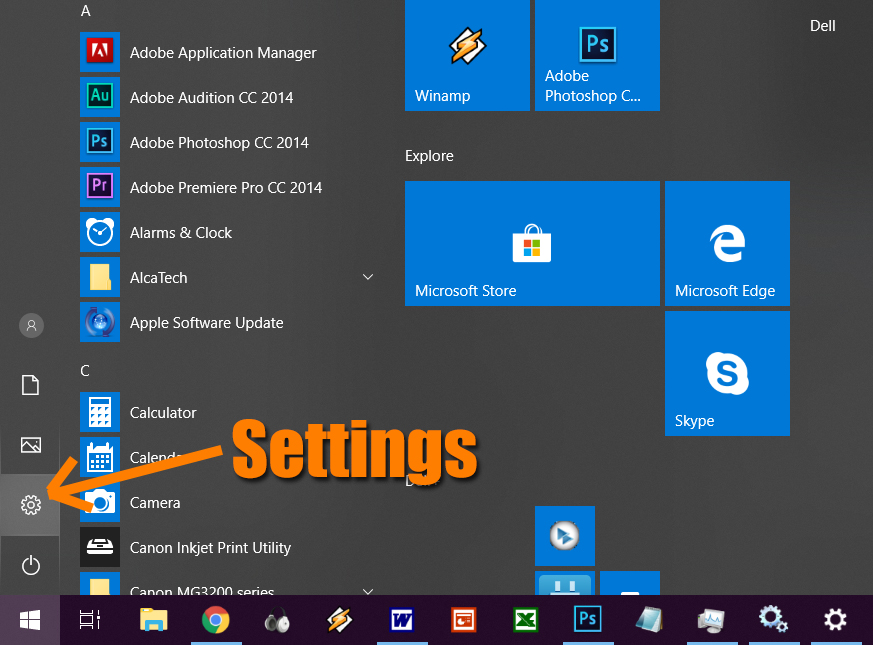
1. Click the Gear Wheel to open up your settings.
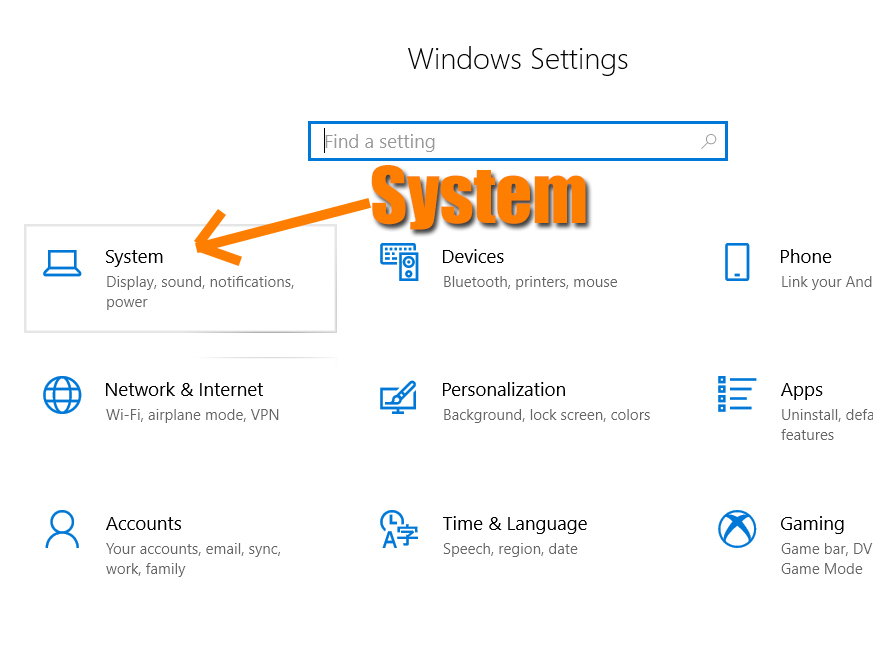
2. Click System.
3. Click Notifications.
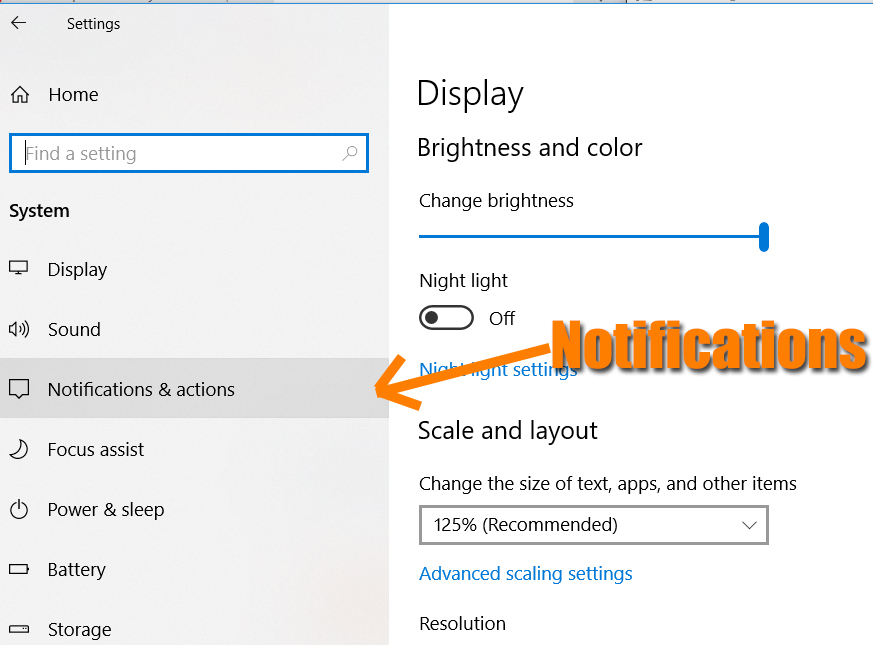
4. In Notifications & Actions, turn off ALL notifications!
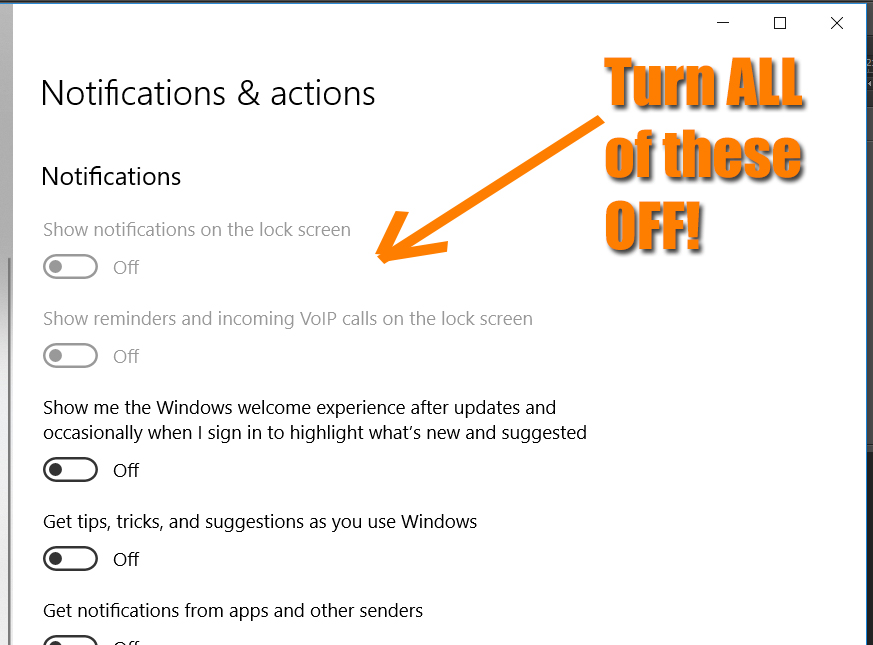
5. Close the Settings Window.
That’s it for step 1! You don’t need to be notified of anything—all it does is interrupt your work, right? Then again, if find something you deem important while reading through your notifications, you’re welcome to leave it on. If your disk usage stays high, you might have to go back and turn it off later.
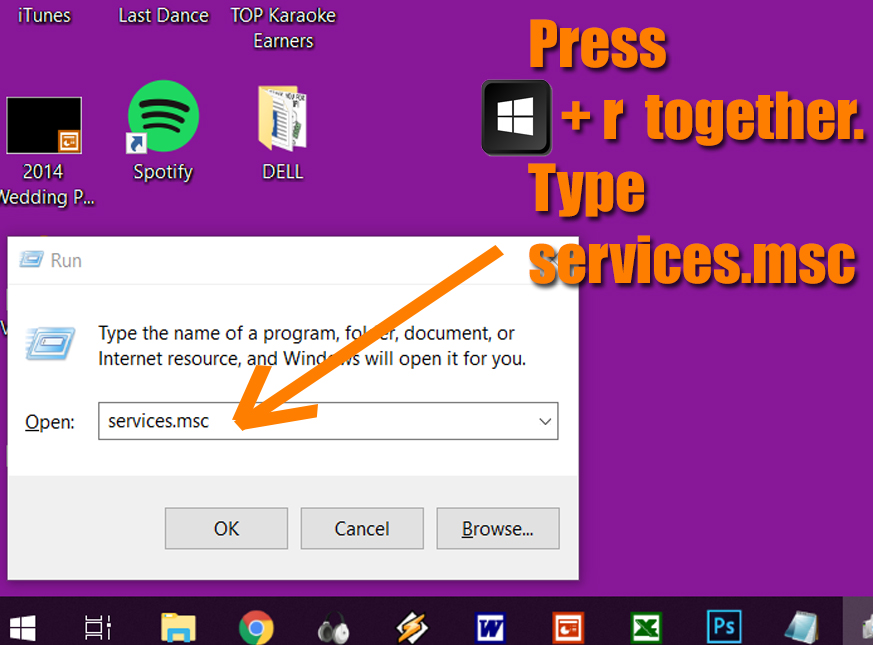
STEP 2: DISABLE Superfetch
For Superfetch, you’ll need to get into your Services…here’s the easiest way to get there, followed by how to disable Superfetch permanently!
1. To open up the Run window, press the Windows key and the letter r at the same time.
2. Type services.msc and click OK.
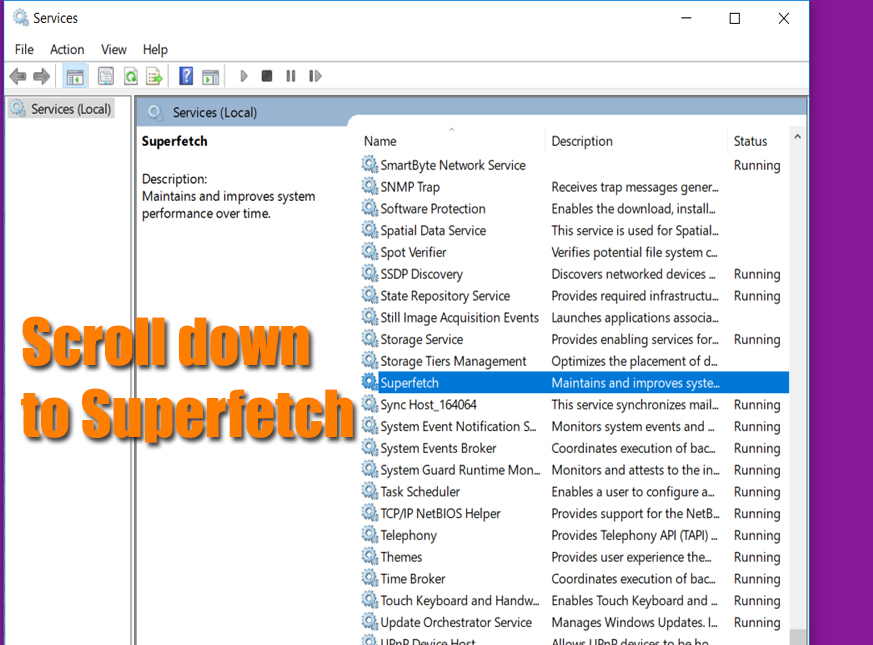
3. In Services, scroll down and find Superfetch.
4. Right click and select Properties.
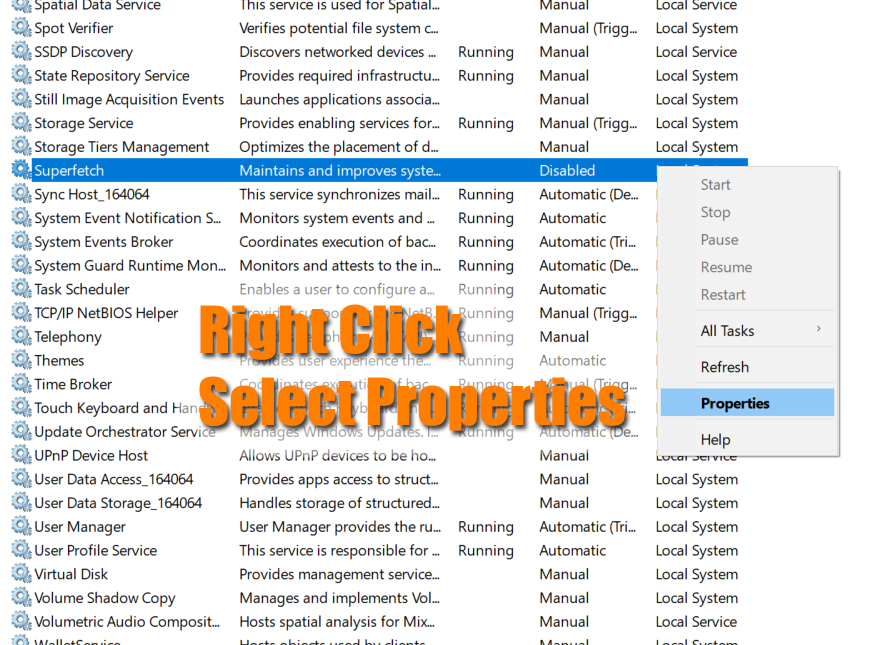
5. In General, change the Startup Type to Disabled.
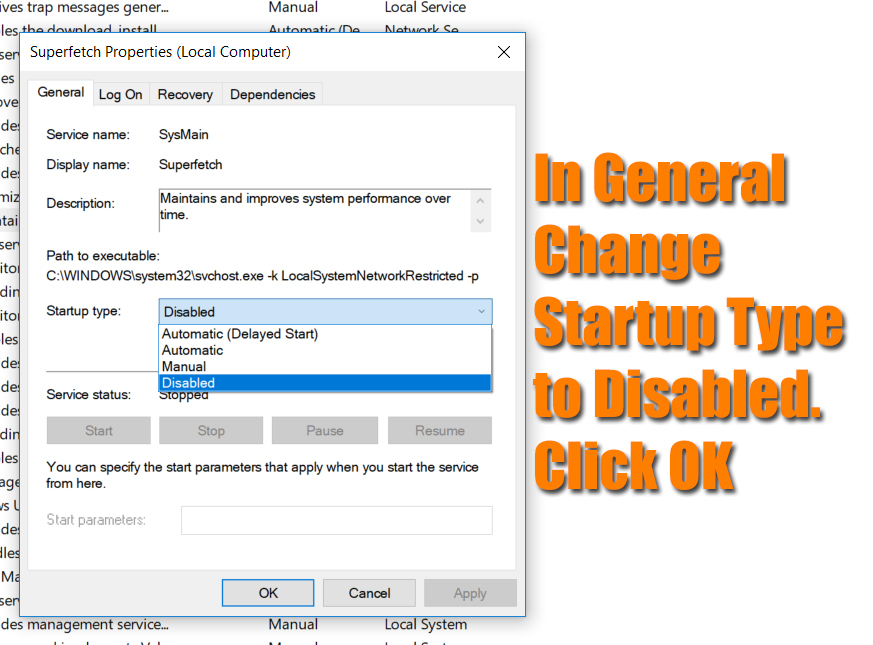
6. Click OK.
At this point, you can take two actions. First, you could simply right click Superfetch again and select Stop to end this process and then go on with your life. Second, you could reboot your computer. After rebooting, I checked Superfetch and it was still disabled, hallelujah.
I hope this helped you! Let me know in the comments!